Showing posts with label bedroom. Show all posts

Wednesday, August 12, 2015

Star Art for Jacob

Jacob's grandma got him some metal stars for his birthday.  We decided to make some art with them to hang on his wall.


The plywood is 21"x21".  I measured out and marked the lines for the 7" square boxes.  Taped it all off and then primed and painted the squares I wanted white.  Then I glued the stars on and nailed the trim pieces on.  All that was left to do was add some picture hanging wire to the back and hang it on the wall in Jacob's room.


Thursday, July 16, 2015

Jacob's Room

I have been working on Jacob's room.  I painted the walls and restained the trim from sedona red to java.  I also painted his bed, desk and entertainment center.

Here are the before and afters:


The map came from art.com


Here are the paint colors we used.  The red was called Colonial red but it was to bright so we toned it down by adding some left over brown paint to it.

Still on the to do list is restain the crown, restain the backside of his door, get some bedding and closet doors.

You know you have painted a lot (between work stuff and our home) when about 1/3rd of your wardrobe looks like this:


Friday, July 18, 2014

Repurpose A Picture From A Book

I've been looking for two small pictures to put in the frame I found.  Then I realized we had 2 Black Beauty books and one was all chewed up from when Dozer was a puppy.


I cut out the 2 pictures I wanted then colored them in with colored pencils.  Inexpensive and easy!


 Here's the one I cut out and colored for our bathroom.


Monday, July 7, 2014

Dresser Makeover

This was a free to us dresser from some friends of my inlaws.  2 of the drawers had come apart, the paint was flaking off and it wasn't pretty.

I stripped the drawer fronts and the top of the dresser.  Then filled the holes in the drawers.  The 2 top drawers do not match because one was rebuilt at some point in time and then painted.  Who ever painted it did not prime it first.    After sanding down the drawer fronts I sanded the entire dresser to get off all the paint that was flaking and get rid of the paint drips that were on it.   After priming the dresser really good I gave it 2 coats of satin black paint.   The dresser top and drawer fronts were stained with General Finishes Brown Mahogany gel stain and then topped with satin polyurethane.  Eventually I'd like to re-veneer the 2 top drawers.  The one has 7 drawer holes in it  and the other is just missing the veneer.

Here's all the before, during and after pics.


To strip the drawer fronts and tops I just painted on the stripper, let it sit for a few minutes then scraped it all off with a putty knife.  Make sure you wear gloves!


I filled all the drawer pull holes with some water based wood putty that was stainable.  This particular putty a cherry color.


I had to glue 2 of the drawers back together:
 Here's the after:


To make the drawers slide better I took some soap and rubbed it on the bottom rails of the drawers and also inside the dresser where the drawers slide in.  No more stuck drawers!


Here's the before and after again!


The frame, tray, and horse head all came from Home Goods.  The 3 books I already had and the barn star came from Lowe's a few years ago. Now to figure out what picture to put in the frame!


Linked up with:


Wednesday, July 2, 2014

TV Shelf

The tv needed a shelf to sit on.  I went back and forth as to whether or not I wanted to hang it on the wall or just make a shelf.  So I went with a shelf.  I found a scrap piece of wood in hubby's work shop that was already stained so I had to sand it down to restain it.   Then I found another board in the barn that was used for something else and I ran that through the planer to make it thinner and help take the stain off that. 

I cut the one board in half and then pocket screwed it together to make the top of the shelf.
That is what it look like after I sanded it, screwed it together and routed an edge on it.  I then stained the top with General Finishes Brown Mahogany stain and put a few coats of wipe on poly on it.

I then pocket screwed the sides together after I had painted them black.  Then pocket screwed that to the top of it.

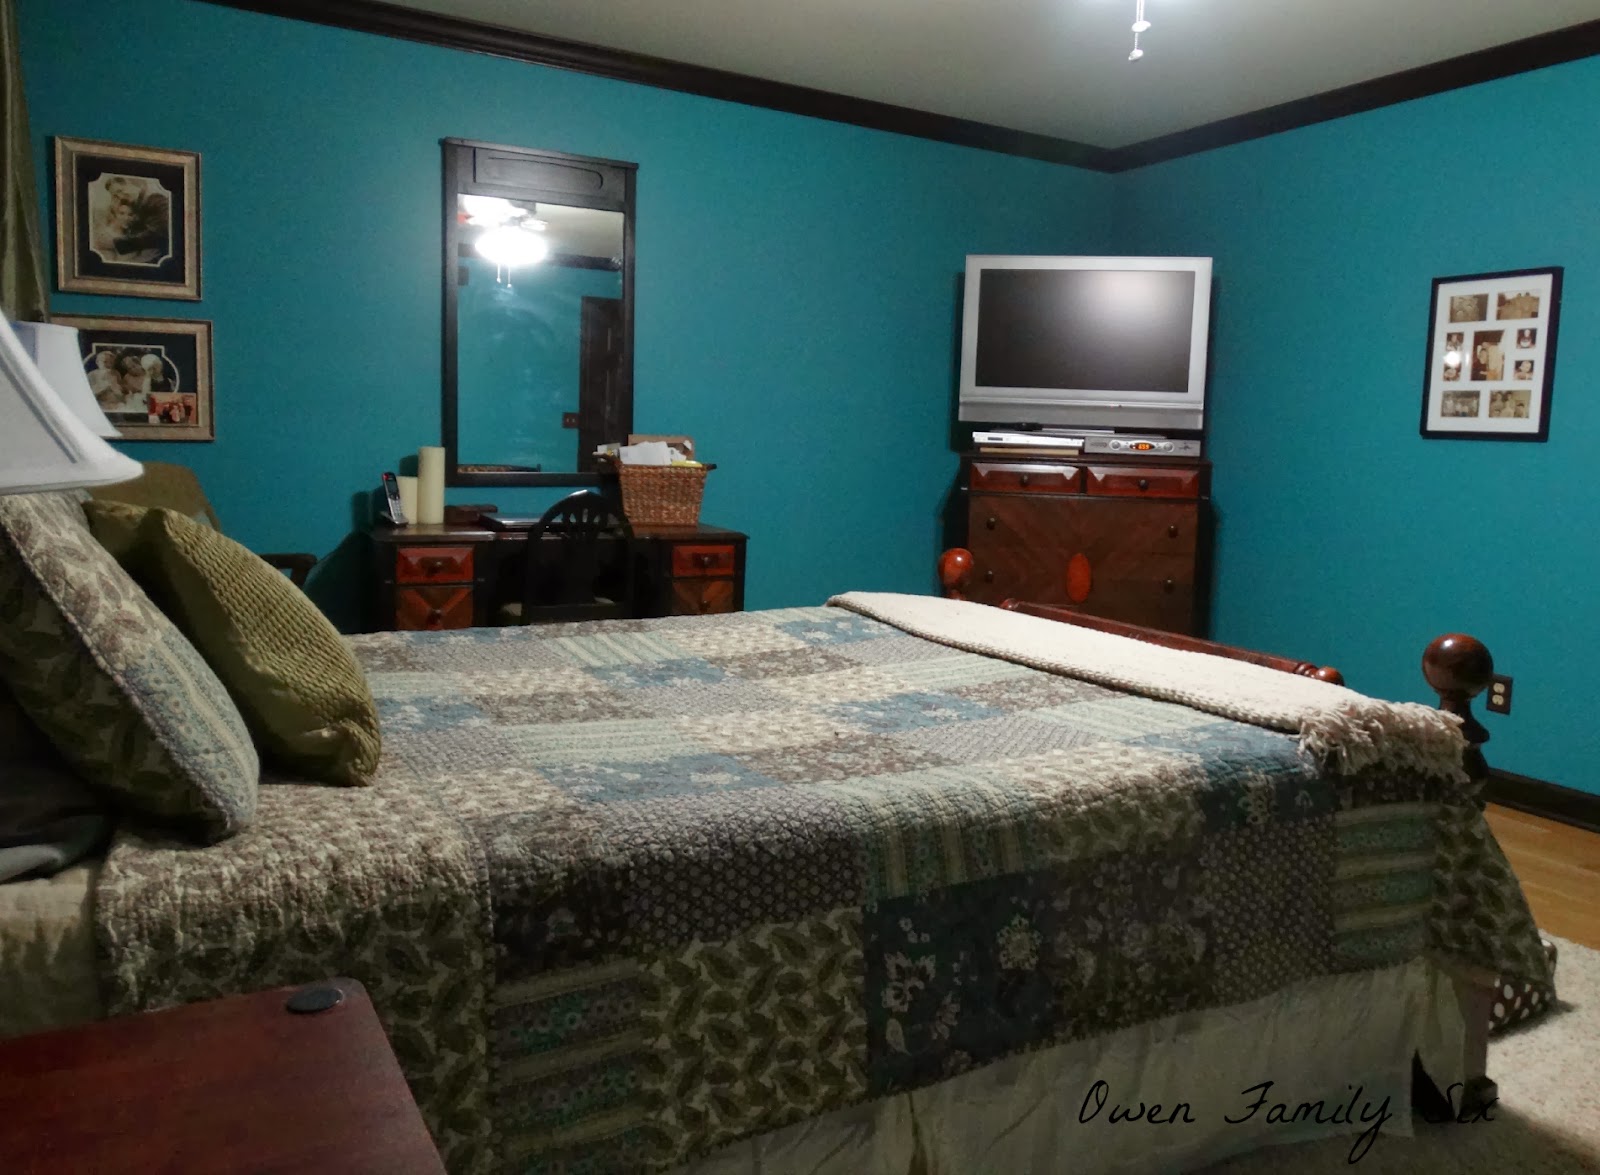
Here's the dresser and tv before I moved the mini fridge into our closet.
This is what it looked like after I moved the fridge.  I just took 2 small pieces of wood to lift the dvd player up some so the tv would be level.


And here it is now.


There a little snap shot of what I am doing now.  I wanted to paint the room the same color as the kitchen and get rid of the blue.  I like the blue but just can't live with the blue it's just so dark and it's not even close to the blue in the quilt. Here's where I talked about wanting to change the color.

Eventually I'd like to get a tv that is a bit smaller.  I know I measured a newer one that doesn't have the big "frame" around the screen and we could get the same size screen and the tv will be much smaller than that one. 


Tuesday, June 17, 2014

Mirror Update

I found a wooden applique at Menards the other day and thought it would be the perfect size to add to our mirror in our bedroom.  The mirror did start out a very dark walnut color before a I painted it black a few years ago.

I used General Finishes gel stain in Brown Mahogany and then sprayed a sealer over it once it dried.  I used a quick setting glue called Titebond instant bond wood adhesive to apply it to the mirror. It sets up in 5 seconds so you don't have much time for alignment.


Mirror Before:

Mirror After:


You can see HERE how the desk/dresser started before I painted them.

Linked up with:

By Stephanie Lynn

Sunday, June 15, 2014

Nightstand

The other day my inlaws picked up a few pieces of furniture that a friend of theirs was giving away. So we ended up with a nightstand, a cedar chest and a dresser.  All need a little love and some repair.

I honestly can't wait to work on the dresser but I started with the little table.

It was very dirty and had peeling paint.  I scrubbed it really well, scraped the paint that was flaking and sanded it down really good after that.  Then gave it a good coat of primer and a coat of paint.  It needs a 2nd coat of paint but I ran out.  I spray painted the nightstand Ford Blue.

Here's the Before:


After:


Nathan loves his little table.  You can see more of his room HERE,

Linked up with:
http://www.funkyjunkinteriors.net/2014/06/upcycled-side-tables.html